St Mawes Castle: Difference between revisions
| (20 intermediate revisions by the same user not shown) | |||
| Line 4: | Line 4: | ||
<br> | <br> | ||
= ''Introduction'' = | = ''Introduction'' = | ||
[[File:St | [[File:St Mawes Castle by Night.jpg|900px]] | ||
<br> | <br> | ||
<br> | <br> | ||
| Line 40: | Line 40: | ||
== Leadership == | == Leadership == | ||
* -- [[File:Herbert Northrop 2.jpg| | * -- [[File:Herbert Northrop 2.jpg|300px]] -- [[Herbert Northrop]] -- Brigadier of the British Army | ||
* -- [[File:Odin Blackman.jpg| | * -- [[File:Odin Blackman.jpg|300px]] -- [[Odin Blackman]] -- Fort Physician (''Deceased'') | ||
* -- [[File:Glanville Briley.jpg| | ** -- [[File:Adrian Phillips.jpg|300px]] -- [[Adrian Phillips]] -- Physicians Assistant | ||
* -- [[File:Jordon Foss.jpg| | * -- [[File:Glanville Briley.jpg|300px]] -- [[Glanville Briley]] -- Chief of Section Seven | ||
* -- [[File:Jordon Foss.jpg|300px]] -- [[Jordon Foss]] -- Anglican Deacon & Chaplain | |||
== Troops (30) == | == Troops (30) == | ||
* -- '''[[Camryn Key]]''' -- Captain | |||
* -- '''[[Houston Blackburn]]''' -- Lieutenant | |||
* -- | * -- | ||
* -- | * -- | ||
| Line 51: | Line 54: | ||
* -- | * -- | ||
* -- | * -- | ||
* -- | |||
* -- | |||
== Prisoners == | == Prisoners == | ||
* -- [[File:Earl Parish Gallu 2.jpg| | * -- [[File:Earl Parish Gallu 2.jpg|300px]] -- [[Earl Parish]] -- Prisoner Zero | ||
* -- | * -- [[File:Gallu Lincoln Comstock.jpg|300px]] -- Lincoln Comstock (Treason) | ||
* -- | * -- [[File:Gallu Phil Jarrett.jpg|300px]] -- Phil Jarrett (Theft & Murder) | ||
* -- | * -- [[File:Gallu Arden Warrick.jpg|300px]] -- Arden Warrick (Mutiny and Desertion) | ||
* -- | * -- [[File:Gallu Bishop Barker.jpg|300px]] -- Bishop Barker (Slavery) | ||
* -- | * -- [[File:Gallu Rupert Hudnall.jpg|300px]] -- Rupert Hudnall (Mass Murder) | ||
* -- | |||
* -- | == Spies == | ||
* -- | * -- [[]] -- [[character|300px]] -- | ||
* -- [[]] -- [[character|300px]] -- | |||
* -- [[]] -- [[character|300px]] -- | |||
---- | ---- | ||
<br> | <br> | ||
---- | ---- | ||
== Items == | == Items == | ||
:[[File:Glastonbury Fragment.jpg|300px]] -- '''[[Glastonbury Fragment]]''' -- Occult Folio | |||
:[[File:Black Viral Vector.jpg|300px]] -- [[Black Viral Vector]] -- | |||
:[[File:Violet Viral Vector.jpg|300px]] -- [[Violet Viral Vector]] -- | |||
---- | ---- | ||
<br> | <br> | ||
Latest revision as of 01:59, 27 October 2025
[[]]
Introduction

St Mawes Castle (Cornish: Kastel Lannvowsedh) is an artillery fort constructed by Henry VIII near Falmouth, Cornwall, between 1540 and 1542. It formed part of the King's Device programme to protect against invasion from France and the Holy Roman Empire, and defended the Carrick Roads waterway at the mouth of the River Fal.
History
The castle was built under the direction of Thomas Treffry to a clover leaf design, with a four-storey central tower and three protruding, round bastions that formed gun platforms. It was initially armed with 19 artillery pieces, intended for use against enemy shipping, operating in partnership with its sister castle of Pendennis on the other side of the estuary. During the English Civil War, St Mawes was held by Royalist supporters of King Charles I, but surrendered to a Parliamentary army in 1646 in the final phase of the conflict.
The castle continued in use as a fort through the 18th and 19th centuries. In the early 1850s, fears of a fresh conflict with France, combined with changes in military technology, led to the redevelopment of the fortification. The out-dated Henrician castle was turned into a barracks and substantial gun batteries were constructed beneath it, equipped with the latest naval artillery. In the 1880s and 1890s an electrically operated minefield was laid across the River Fal, operated from St Mawes and Pendennis, and new, quick-firing guns were installed at St Mawes to support these defences.
Defenses & Layout

St. Mawes Castle, a coastal artillery fort built by Henry VIII in the 16th century, features a distinctive cloverleaf plan with a central tower and three forward-facing bastions. Historic England archive plans and images show the castle's layout, including gun embrasures, a lookout turret, and a parapetted gun platform. The bastions were designed to house various artillery pieces, including swivel mounts and larger guns.
Detailed Breakdown

Central Tower
A three-story structure with a lookout turret and a 17th-century cupola.
Bastions
Three forward-facing bastions (a forward bastion and two side bastions) designed for artillery.
Gun Platforms
The bastions and the central tower feature gun platforms with embrasures for different types of artillery.
Defensive Features
The castle includes parapets for protection and swivel mounts for lighter guns.
Modern Additions
The forward bastion's roof is a modern addition, following an archaeological debate about whether it was originally covered.
Leadership
- --
 -- Herbert Northrop -- Brigadier of the British Army
 - --
 -- Odin Blackman -- Fort Physician (Deceased)
- --
 -- Adrian Phillips -- Physicians Assistant
- --
- --
 -- Glanville Briley -- Chief of Section Seven
 - --
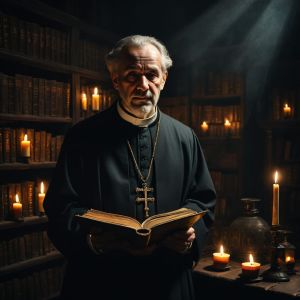 -- Jordon Foss -- Anglican Deacon & Chaplain


Troops (30)
- -- Camryn Key -- Captain
- -- Houston Blackburn -- Lieutenant
- --
- --
- --
- --
- --
- --
Prisoners
- --
 -- Earl Parish -- Prisoner Zero
 - --
 -- Lincoln Comstock (Treason)
 - --
 -- Phil Jarrett (Theft & Murder)
 - --
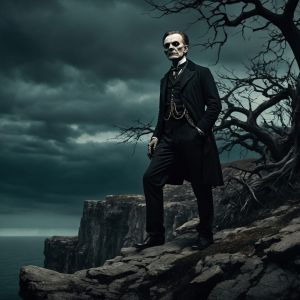
 -- Arden Warrick (Mutiny and Desertion)
 - --
 -- Bishop Barker (Slavery)
 - --
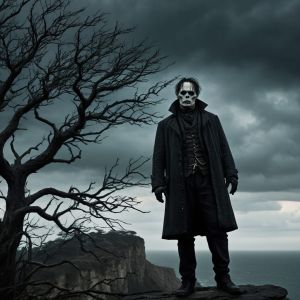
 -- Rupert Hudnall (Mass Murder)


Spies
Items
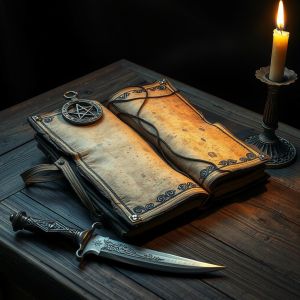 -- Glastonbury Fragment -- Occult Folio
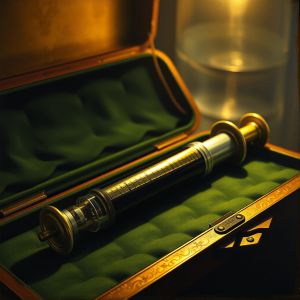 -- Black Viral Vector --
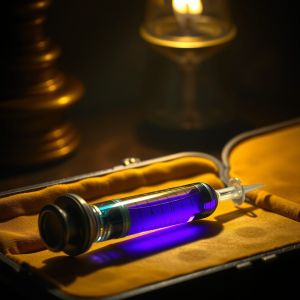 -- Violet Viral Vector --


Sources
https://en.wikipedia.org/wiki/St_Mawes_Castle
https://www.english-heritage.org.uk/visit/places/st-mawes-castle/history/
https://explorecornwall.uk/attractions/st-mawes-castle/